
The Delivery tool allows you to create and manage your Schedules.
Each Schedule represents the delivery settings for a specific course. A Course can have many Schedules.
From the Schedule Dashboard, you can view, edit, or delete your Schedules and view Enrollment Options.
Clicking Edit next to a particular Schedule will bring you to the Schedule Settings Page.
Schedule Settings Page:
Here you can choose the Course, Scheduling, and Sharing options for your Schedule.
Schedule Name:
A learner enrolls in a course through a schedule that governs the scheduled (days/times) messages will be sent. This is the name of the schedule for your new course. After your course is live, you can view this schedule in the Schedules tab of the platform. This name will be used in analytics and can help organize courses and a learner pool.

Channel:
For delivery via SMS, Slack, or Microsoft Teams (v2+), you can send content via channels. Channels help you better organize content by theme for your learners. To learn more about channels and how they work with different delivery methods, read Settings: Channels
Scheduling Options:
In the next section, you can choose the days and times your course will be delivered. You can also decide what to do if people are not engaging with your course content. You have two primary options, Basic and Custom Scheduling.
Basic Schedule:
Timezone: Select the Timezone for this distribution. The precedence order is user timezone > distribution timezone > organization timezone.
Cadence: Allow users to progress through the course at their own pace by choosing the Instant option, or choose Scheduled to select specific days for delivery.
Launch Date: Choose a day when the course will launch or leave blank to enroll users as soon as the Schedule is published.
Lesson Days: Simply click the days you want your course content to be sent, they will be highlighted in orange, and days in white will not be included. For example, if you only want course content sent on weekdays, click Monday through Friday so they are highlighted orange and leave Saturday and Sunday white.
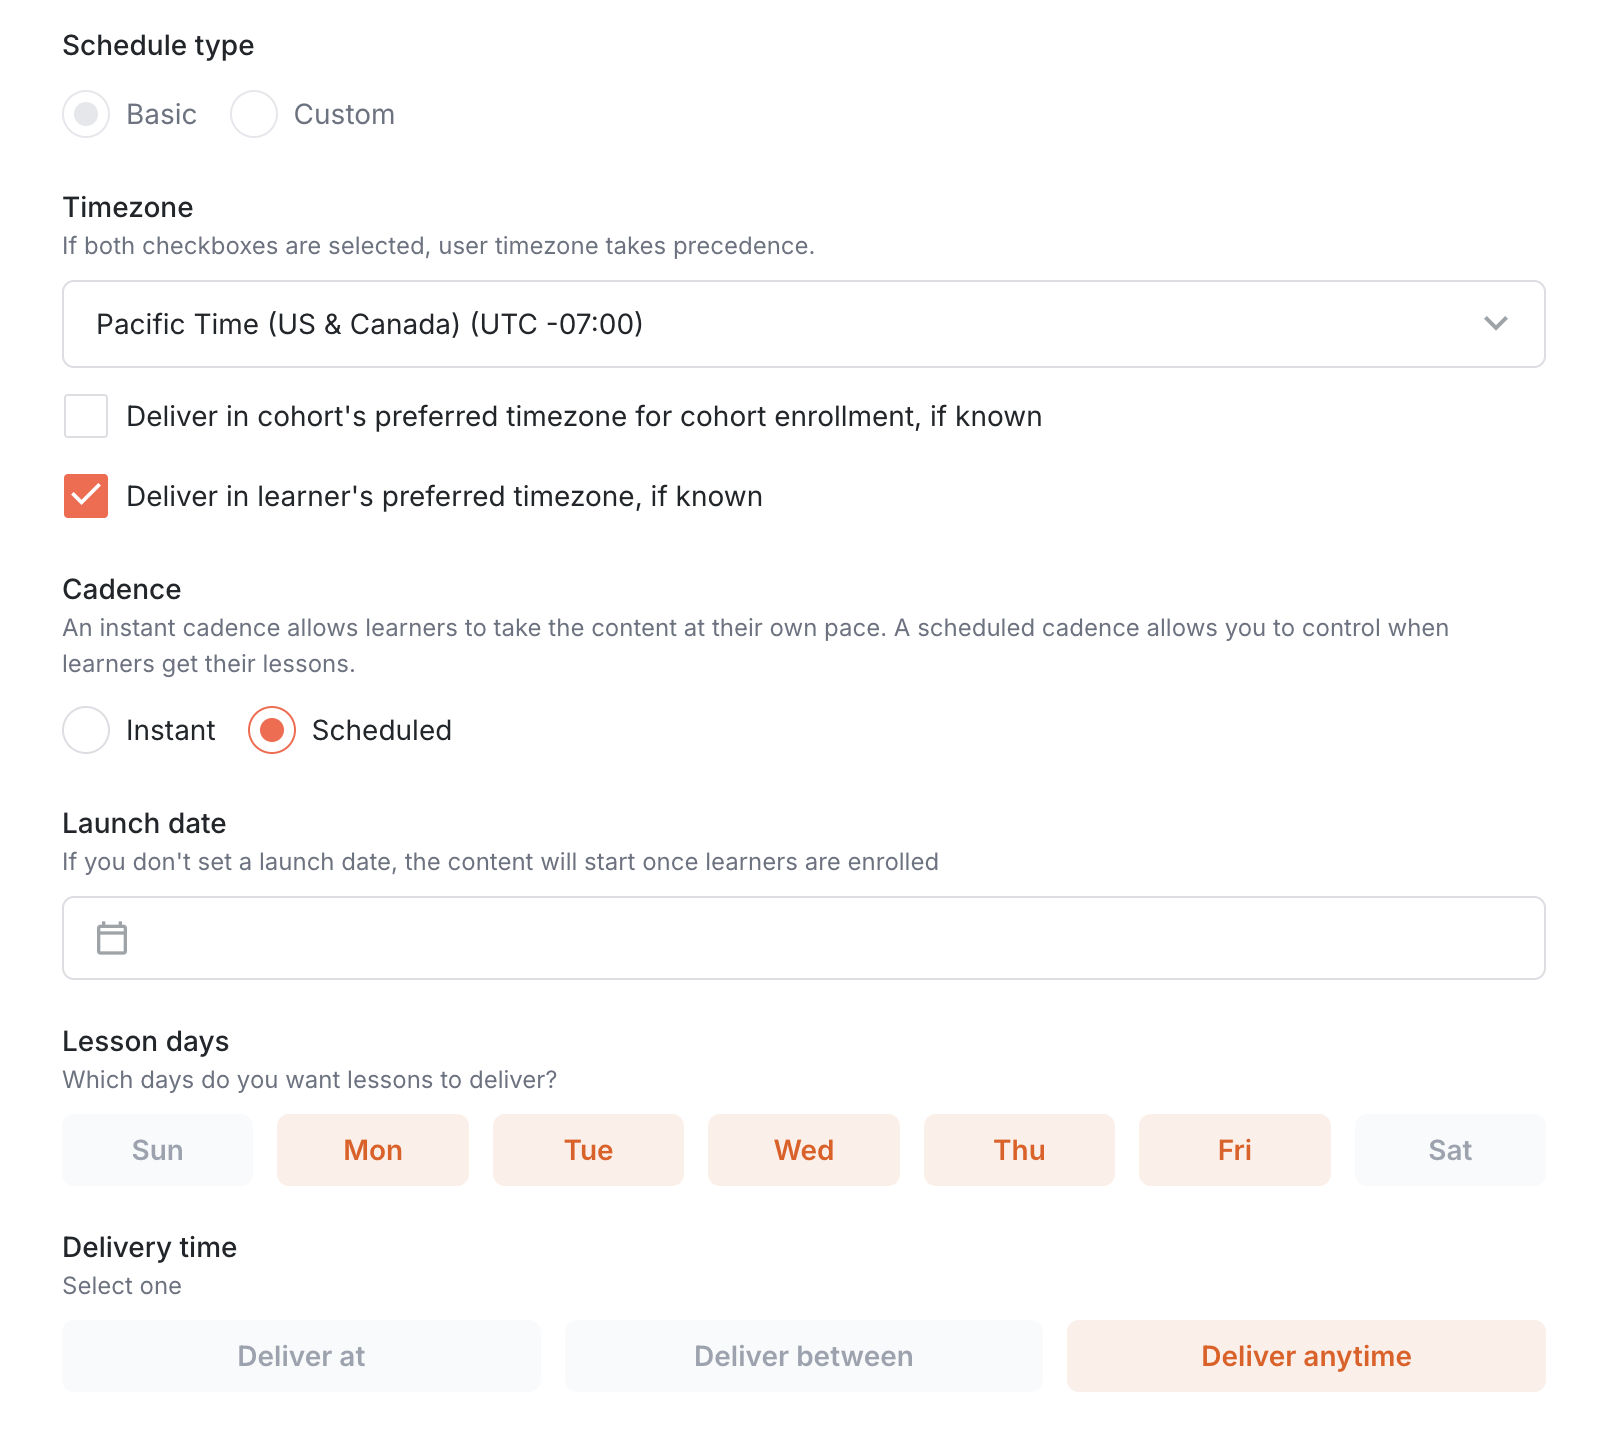
Delivery Time:
This sets the time window when messages can be sent. You can lengthen or shorten this time window as needed. Or you can simply deliver all messages at the same time each day.
Deliver At - This will set a specific time that each lesson will be received on the days chosen. Learners will not be able to change the time. This option is good for when specific time frames or schedules must be adhered to.

Deliver Between - This will provide a window of time that lessons can be delivered in. The first lesson will be sent at the start of this window and afterwards, learners will have the option to choose a preferred time slot within the hours given to adjust to their preference. This can also be a good way to ensure learners receive content during work hours or avoid times at which you may not want training to be sent.

Deliver Anytime - This will allow lessons to be delivered at any time during the 24 hour window each day. This gives the greatest amount of flexibility for learners to choose preferred delivery times. However it is important to not that if this option is selected, learners will receive their first message at the time the schedule is published. (i.e. if you publish this at 11am EST, learners will be enrolled then and receive their lessons daily at that time unless they change it.)
 Custom Schedule:
When To Deliver: A Custom Schedule gives you the option to select specific dates and times for the delivery of each lesson OR the option to have lessons delivered a specific amount of days after the previous lesson.
Timezone: Select the Timezone for this distribution. The precedence order is user timezone > distribution timezone > organization timezone.

Custom Schedule - Late Enrollment & Catch-Up Feature:
What happens when users join late: When you enroll users in a custom schedule after it has started, they'll automatically enter "catch-up" mode to get current with the schedule.
How it works:
Users can be added to a custom schedule at any time
If they're behind on lessons, they'll receive content on an Instant Cadence (see below) until they catch up
They'll stay on this fast-paced delivery until they're completely current with the schedule
If learners don't reply to messages when in catch-up mode, it will automatically go to the next lesson after 24 hours
User experience:
Initial setup: Users receive the activation message first (without timing details since lessons will be instant)
Catch-up notice: "Please note: You have been enrolled in this course late. Please respond to each lesson and question as soon as you can to catch up."
During catch-up: Lessons are delivered instantly, waiting 24 hours for responses
When caught up: "Nice job! You're now caught up and can expect your next lesson at [day/time]."
Going forward: Users follow the normal custom schedule timing
This eliminates the need to create separate schedules for late joiners while keeping everyone aligned.
Instant Schedule:
Arist offers the option to take courses in a rapid-fire or self-paced manner. This is achieved by using the Instant Cadence on your Schedule.
When you take a course using the Instant Cadence, your response to each question will trigger the next lesson until you have made it through the entire course. If required responses are not turned on, the course will automatically progress to the next lesson after 24 hours, excluding weekends. On an Instant schedule, you can still set a launch date and delivery time, which is when the first lesson sends.
Note: If the lessons in a course don't have questions, an instant cadence will send the first and second lessons instantly, with following lessons sending 15 minutes apart until the final lesson has been sent. A learner can respond NEXT to receive a lesson sooner than 15 minutes.
Instant courses are great for reviews and reinforcement because they allow learners to take course as quickly as they want.
Other Settings:
Required Responses: When this is toggled on, learners must reply to questions in order to receive the following one, even if it is a scheduled or instant course. This means that even if you enroll everyone on the same day, they could end up in different places of the course depending on how fast they respond to the questions.
Continue to send on Weekends: When required responses are off for Instant schedules, learners receive new lessons 24 hours after the first lesson. If the toggle is on, lessons will continue sending on weekends if learners do not respond. When turned off, new lessons will only send on weekdays (unless prompted by learners).
Reminders: Friendly response reminders are sent to encourage learners to respond to their lesson engagement question. These can be toggled on or off here and can be customized from the Settings page on the Response Reminders tab. For more information about these please refer to: Settings: Response Reminders
 Delivery Tracker:
Once you've created a schedule and sent it to learners, you can click into the schedule to track the message delivery. This page will show if any learners have opted out, paused the content, concluded the content, etc.
Clicking on the "Enroll Learners" button on the top right of this screen will allow you to send the course to a learner or a group of learners.
Select Cohorts: The most common way is to select a cohort that you've imported which will allow you to enroll users in bulk. For more information on managing and creating cohorts, go to this article: Cohorts
Enroll Individuals: Clicking this dropdown will allow you to search your list of learners for individuals and enroll them one by one. This can be useful for grabbing a few learners to test a course or if you need to add a couple of learners after the fact.
Clicking on the "Share with learners" button on the top right of this screen will show you multiple self-enrollment options for the learners.
Share to web: You can share this link or QR code with learners, so they can sign up for the course. Learners can choose from any available delivery method to receive this course. For more information on this self-enrollment option, read How to Self-Enroll in Arist Courses.
Display in course catalog: This will show the Schedule in your course library. This is useful for sharing a suite of courses with your learners.
Enable code-based enrollment: Learners can also enroll by messaging a shared course code through their preferred communication platform.
Prioritize enrollment: This will move the enrollment to the top of the queue for all learners if they have previously scheduled enrollments queued.
Still need help?
Contact us